How to request a flight with the Agremo app
This feature is only available for enterprise clients.
No matter what Agremo product you use, you must have a GeoTIFF map of your field before submitting analyses and acquiring precise data about your crops. If you don’t have a map and don’t want to buy a drone, it is still possible to use the Agremo app. Instead of adding a map, you can request a flight and our team will find the nearest drone operator and organize a drone flight over your field. As a result, a .geotiff file of your field will be uploaded directly to your account so that you can start requesting plant count and plant health analyses in the Agremo app.
How to request a flight on the new field
If you are a new user or you want to add a field, it all starts with that option on the main home screen of the app. You can either add a new field by filling in the dialog with necessary details or by importing it from the John Deere Operations Center. Depending on the country you choose, the map will be zoomed to that part of the world and you just need to use the “zoom in” option to find your exact field location. The search bar can also help you find the field by its location more quickly.
Once you have located your field, create a field boundary (mark the borders of your field) there and choose the next action. The main difference between a field boundary and annotation is that the boundary space contains the whole field and inside that boundary, you can draw annotations in case you want to analyze only one part of the field.
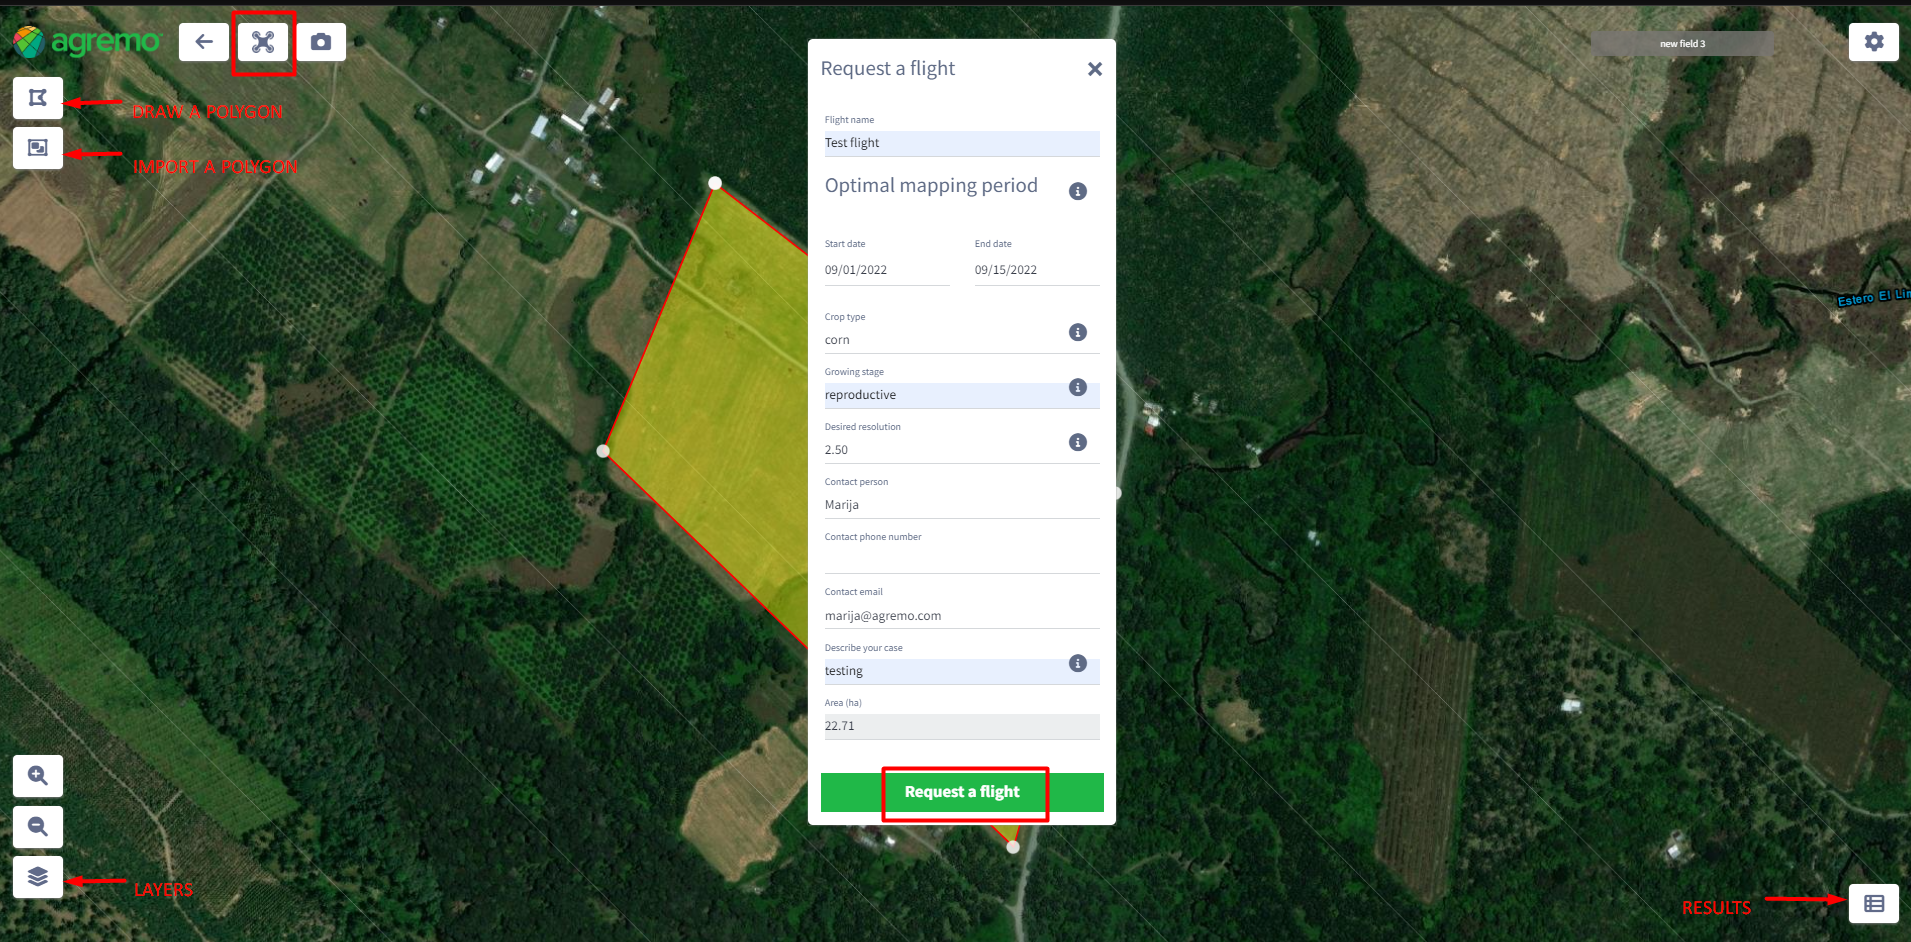
When you draw a boundary and confirm it, you will see the option to request a flight. If you want to request a flight for the whole field just continue with that action by filling in the “Request a flight” dialog. If you want to request a flight only for the part of your field, close that dialog and use the Draw Polygon ![]() option on the left or import an SHP file from your computer. The same dialog will pop up again, asking you to fill in the details about the flight. View the tooltips for more information about each field that must be filled in.
option on the left or import an SHP file from your computer. The same dialog will pop up again, asking you to fill in the details about the flight. View the tooltips for more information about each field that must be filled in.
How to request a flight on the existing field
A drone flight can be requested on existing fields, just choose the field you want and click on the green top right corner of the dialog to find the Request a flight button. Zoom in the field location and use the area tool to draw a polygon and fill in the necessary details (flight name, optimal mapping period, crop type, growing stage, etc.) to request a flight.
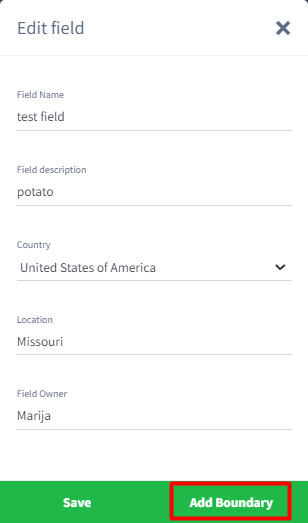
You can also use an Edit ![]() button from the Field list to add a boundary to an existing field and request a flight. This option won’t be visible if you have already created a field boundary. If you have an SHP file of a polygon, you can import it from your computer. If you don’t want to request a flight for the whole field, just draw a polygon inside the field boundary, for the part of the field you want to analyze.
button from the Field list to add a boundary to an existing field and request a flight. This option won’t be visible if you have already created a field boundary. If you have an SHP file of a polygon, you can import it from your computer. If you don’t want to request a flight for the whole field, just draw a polygon inside the field boundary, for the part of the field you want to analyze.
Every time you open the map of that field that has clearly marked borders, the map will be automatically zoomed to that part of the field where the boundary is created.
Copying the flight request
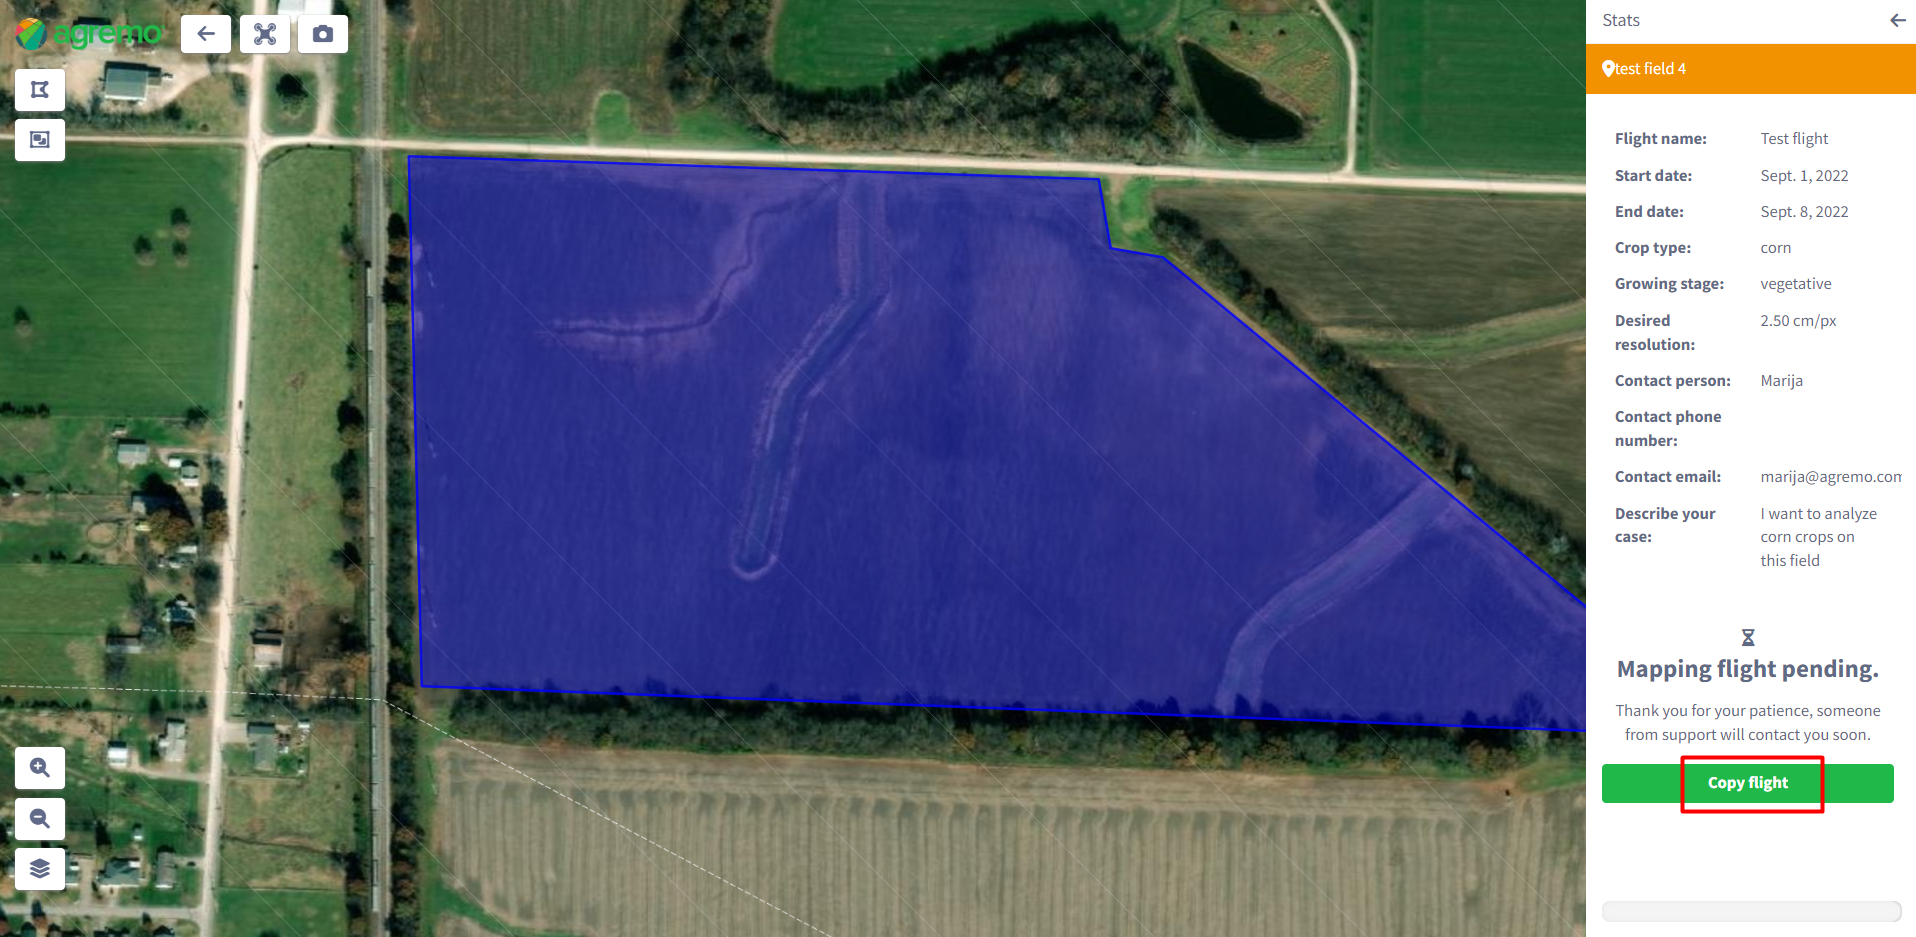
In one field you can create only one boundary, and it cannot be edited or deleted. However, you can draw polygons inside or outside that area and request a flight for each polygon. Furthermore, you can copy the information from one flight request to another and thus save time in filling in all the details again.
Requested flights
After requesting the flight, someone from the Customer Success team will get back to you with details about the available dates in your preferred mapping period and about the nearby drone operators. In the right sidebar, you can track the status of all requested flights and see if they are in progress, canceled, or finished. You will also be notified by email about the status of the requested flight. In the left corner, you will see the Layers tool  where you can turn on or turn off the requested flights and boundaries.
Once the flight is finished and the map is processed, you will be notified by email and the map will be positioned in your field, ready for usage. The flight history is available in the Settings/Account section of the app where you can view all the requested flights and their details.
