The Agremo web app offers you the possibility to turn drone imagery into valuable agricultural insights in just a few clicks.
Create An Account
Go to the Agremo website and create an account by clicking Sign up/Log in located in the upper right corner. Welcome to Agremo!

Add a Field
To add your first field, click the button NEW FIELD in the upper left corner:

Enter the field location and required information. Then, you’ll be asked whether you’d like to add a map to this field.

The field’s location doesn’t have to be too precise, as it will be automatically adjusted based on the data from the georeferenced map. The purpose of entering a location is to allow you to simply find your fields and analyses when you log in the next time.
The data you enter is treated as confidential information. The field and location data you enter is only visible to you and we will never share your personal data with others.
Draw Your Field Boundary
After entering basic field details, you’ll be automatically directed to the Boundary drawing screen
When users first enter the Field Boundary Page, a panel appears on the right side explaining how to create a boundary as a mandatory step.


When a user creates a boundary, the next step prompts them to enter field details, including whether the field is for Production or Field Trials, also a required selection.

After the user enters the field details, a new window will appear prompting them to define the growing season, and this step is optional and not mandatory to proceed.
In the growing season window, it is highly recommended to enter details such as season start date, sowing date, crop type, season end date, and harvest date.

Upload A Map
Agremo offers the following options:
Supported File Types
Orthophoto – a map (GeoTIFF) already stitched in another system.
Raw images – georeferenced images that will be processed in the platform.
Upload Options
From the computer – upload files directly from your device.
Via public link – paste a link to access and upload files.
File Formats
Zipped folders – compressed files in .zip format
Unzipped folders – regular folders containing georeferenced images
Supported Image Types
RGB
Multispectral
Note: When using a DJI M3M drone with RGB and multispectral (MS) cameras, raw images can be uploaded together. Separating RGB and MS files is not required.
For more details on How to upload a map, please refer to the link provided.

SELECT THE AREA YOU WANT TO ANALYZE
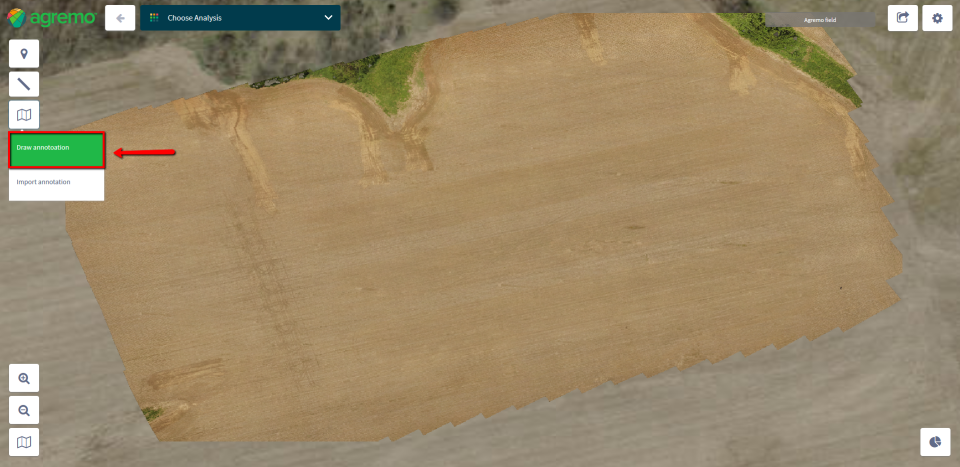
Since you have uploaded and then opened your map, now you need to mark the area on your field that you want to analyze. This is called- creating an annotation.
To create an annotation, select the area measurement tool on the left sidebar.
NOTE: This step is important because analysis will be performed only for the selected area.
Use the dots of the area management tool to mark the area you would like to analyze.

During the selection of AOI (Area of Interest), you can go a step back, and undo the last AOI step by pressing ESC on your keyboard.
You can select the entire field or only parts of it.

If you want to select multiple AOIs or polygons, you can do it by holding SHIFT on your keyboard, and clicking on desired polygons. Please, keep in mind that the requested analysis on multiple polygons will create a cumulative report for the total area under the selected AOIs.
REQUEST AN ANALYSIS
Click on the area you’ve selected in the previous step. Then go to the bar in the upper part of the screen and click Choose Analysis:

Go over the icons to see the exact descriptions of the analyses.
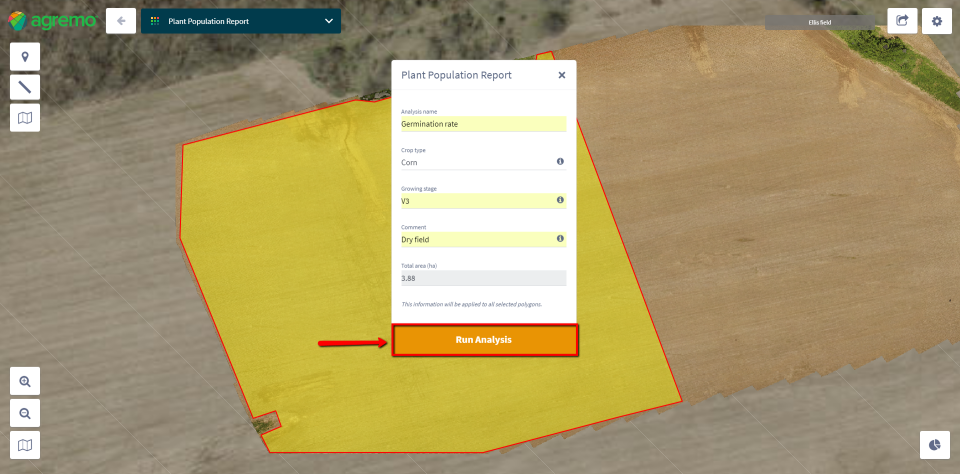
In this example, we are going to request Agremo’s AI analysis. After selecting the analysis you want to perform, a window will appear where you’ll need to fill in the required information. Once you’ve entered your information, click Run Analysis:
After submitting, Agremo will send a confirmation email and display a message on your screen confirming that your analysis was successfully submitted.

That’s all! Your map will be on the way to our team and you’ll have your report ready within 2 business days or less.
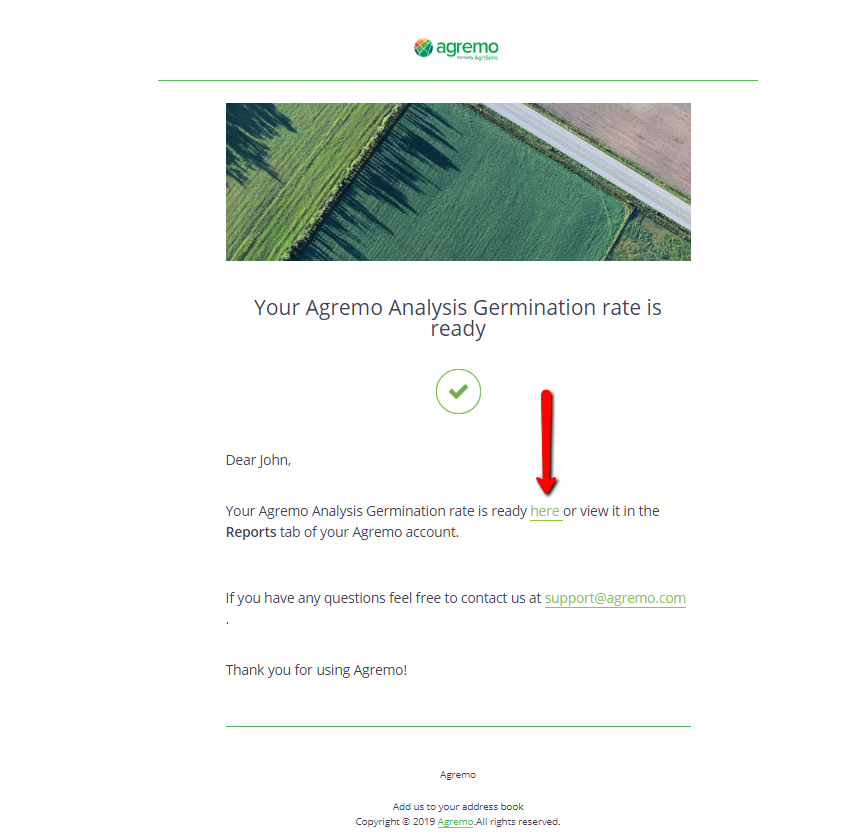
The email you get from us after 2 business days or less contains your final report:
Finally, you can access and download your report on the Agremo app by clicking the icon in the lower right corner of your field screen:
Click on Stats, after which your results appear:

To perform another analysis of the same area or the same field, simply submit another request following the same steps described above.
If you want to know more about the different Agremo result reports, take a look at our new use cases.
Ready to analyze? Create an account (the first 20 acres for analysis are free and there are plenty of things to see even if you don’t have a map yet)!

